Run and grow your coworking space with Nexudus
Manage members, bookings and billing from one platform. Let customers book and pay online.
Trusted by thousands of coworking spaces across 90+ countries.
-
+ 3000
Locations
-
+ 90
Countries
-
2012
Founded
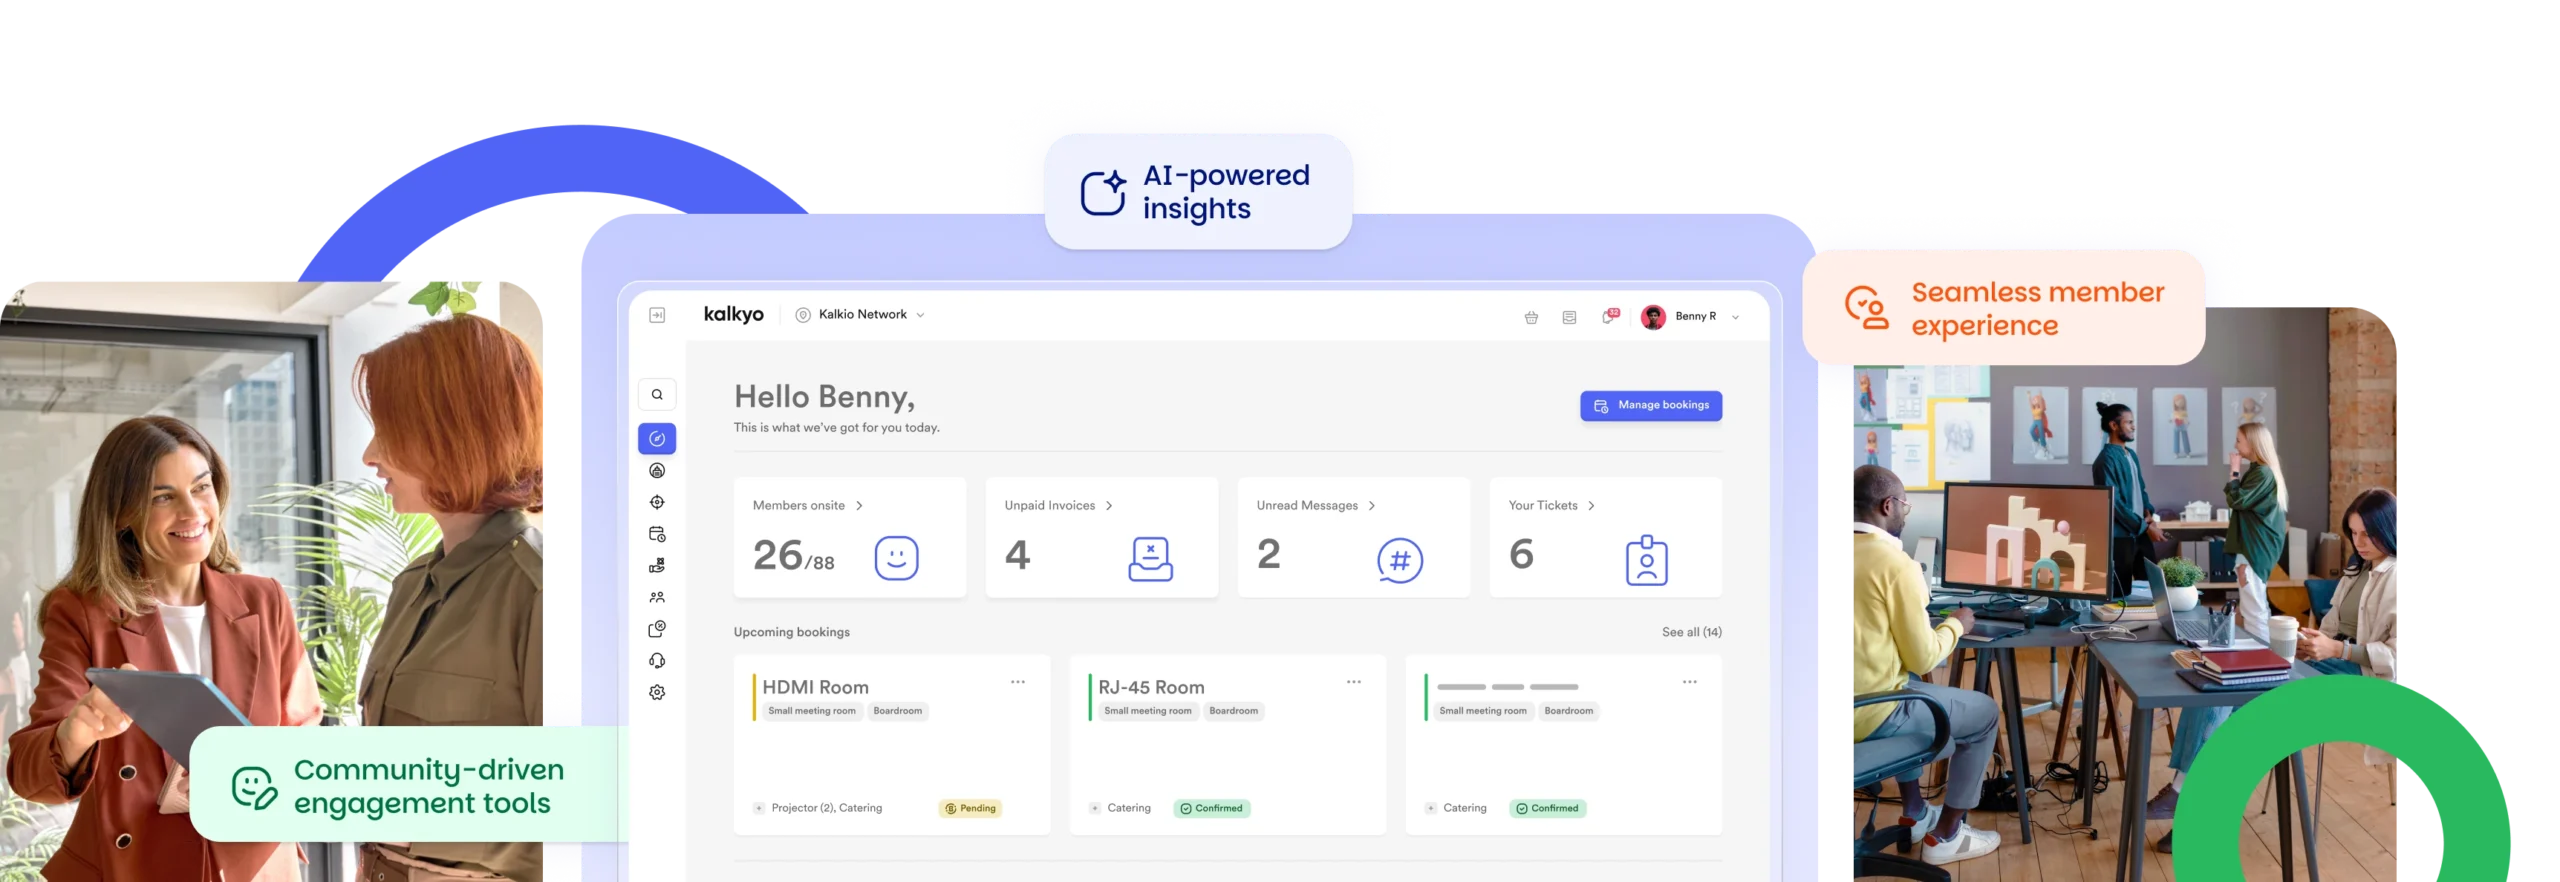
Automate operations with our coworking software
Running a coworking space comes with a lot of moving parts. Nexudus coworking platform helps you cut through the complexity by automating the day-to-day—so you can focus on your members and growing your space.
- Automated billing and invoicing – Save time and reduce errors with recurring payments and accurate invoicing.
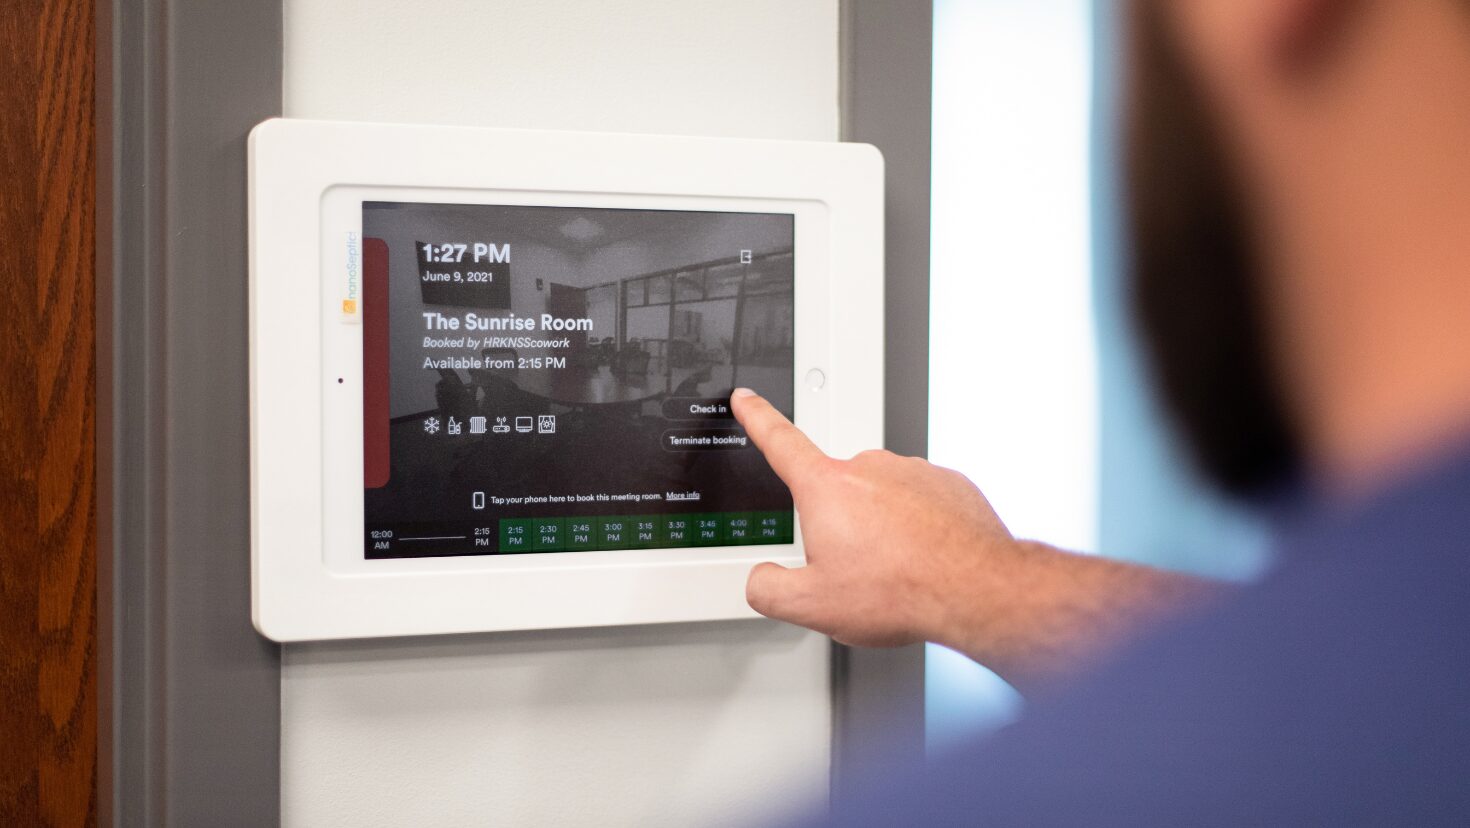
- Smart bookings and access control – Let members book desks and rooms on their own, while the system handles permissions in the background.
- Workflow automation – From contract renewals to task reminders, set it once and let it run.
By streamlining operations, Nexudus gives both managers and members a smoother, more efficient experience.

+3000 spaces powered by Nexudus in +90 countries since 2012


Why Nexudus?


Built on Experience
Over a decade of hands-on insight. Our award-winning support and implementation team will guide you every step of the way—from setup to scaling. We've helped thousands of operators build and grow thriving spaces.


Connected by Design
We offer the most flexible coworking platform on the market. Nexudus integrates with your existing tools—so you can build the tech stack that works for you, not around you.


Always a Step Ahead
12 years leading the coworking industry with data-driven solutions.
Scalable coworking software for multi-location network
As your coworking space expands, managing multiple locations can become complex. Nexudus is built to scale, helping you maintain consistency across your network.
- Centralized admin tools – Handle bookings, memberships, and finances from one place, with role-based access for your team.
- Flexible location settings – Adjust pricing, taxes, and payment processing based on each space or region.
- Clear reporting across sites – Track performance, compare spaces, and spot opportunities to improve.
Whether you’re running two locations or two hundred, Nexudus helps you stay in control and keep things running smoothly.

Flexibility comes standard
Over 60 native integrations. No lock-ins. Just tools that work for you.

Integrate what you use. Brand it your way.
Nexudus gives you full control to personalise your member portal, mobile app, and booking tools—so everything reflects your brand, not ours.
Our coworking software also connects with over 60 native integrations, including:
- Payments: Stripe, GoCardless, PayPal
- Access Control: Salto KS, Brivo, Kisi, Avigilon
- Wi-Fi & Network: Cisco Meraki, Ubiquiti, Ruckus
- Printing: Papercut, Ezeep
- Accounting: QuickBooks, Xero
From branding to backend systems, you can shape the platform around your needs—without compromising on the tools you already trust.

Tried. Tested. Trusted
Real stories from operators growing with Nexudus


Ready to streamline operations and scale your coworking space with ease?
- Scalable all-in-one solution
- +60s native integrations
- World class support